
My day-to-day laptop is a MacBook Air, which I've had since 2010. For crunchier Mac processing I use an iMac and all my main files etc. are all backed up to the rashbre LAN. The amount of storage used in the MacBook Air has casually crept up over the years and although I'll probably replace it one day with a MacBook Pro, now isn't the right time based upon what is anticipated from Apple in the next twist of their product cycle.
Instead, I thought I'd try a simple update to the existing machine, moving it from 256Gb storage to 960Gb (about a terabyte). That should keep the machine current for a lot longer, well past when the predicted 12 inch Airs appear and MacBooks go extra long on battery life.
Apple advise that Airs are preconfigured and can't be changed. I must admit I was expecting to find that things had been soldered inside, but actually the SSD is slotted in.
I soon found a couple of places to get replacement SSDs and ordered one to see what would happen. My machine is quite an old generation although cosmetically it looks almost identical to the sleekest modern ones. This update would make the innards about twice the capacity of the latest Apple machine and well-capable of all its regular tasks.
So what to do? I used a Transcend memory kit. It's well packaged, includes all the tools, an enclosure for the old SSD and is boxed in a manner similar to Apple's own products. I should mention that the shape/configuration of the SSD is specific to the individual MacBook model and needs to be carefully selected. There's also very simplified instructions included and a youtube installation video (which I haven't watched).

The box includes the two screwdrivers for the back of the MacBook Air case and for the internal SSD. Weirdly I'd never really looked at the back of the case to spot the 8 or so screws needing removal.
Before I started to dismantle the machine, I made a copy of its existing disk to the new SSD. I used Carbon Copy Cloner for this, instead if the recommended Disk Utility. That's mainly because CCC handles any errors along the way whereas the Apple-supplied Disk Utility just stops. I then had a cloned copy of the original disk.
I decided to boot the still unopened MacBook Air from the clone attached to USB to check everything had worked. Reboot the machine with the Option key held down, select the USB-attached SSD and yes - it worked. I was moderately surprised that it was a relatively quick boot considering it was across the USB connected drive.
Then to open the case. I arranged the removed screws in a square copying the shape of the MacBook - to ensure I put them back in the right places.
Inside, the vast majority of the MacBook Air is taken up with battery. The processor, memory and SSD are a strip along the top quarter of the innards.
Carefully removing the single screw hooding in the SSD, I swapped in the new one and reassembled everything.
Then a reboot, holding down the Option+R so I could reset the startup disk to the new one.
And Yes- everything works.
Total time - 10 minutes to read instructions and assemble the initial SSD in to a small enclosure. A couple of hours to clone the disk. Ten minutes to test the replacement clone. Fifteen minutes to replace the SSD and reconfigure.
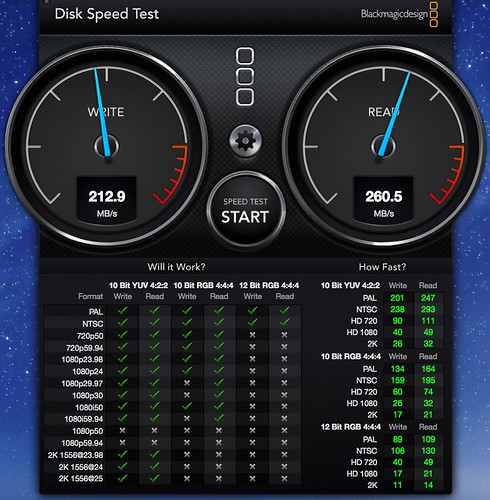
My old free space was around 50Gb. The new free space is around 830Gb. The new speed of the disk is fine. It's slower than a modern machine, partly because of the slower electronics of the 2010 version of the MacBook Air (3Gbit bus being used with 6Gbit SSD) but it is still respectably fast for its expected use.
Even more technical bit, stop here if it is already starting to read like Martian
There's a facility on SSDs called TRIM which is an adjunct to the garbage collection of deleted data. SSDs work differently from hard disks. Some say to switch on TRIM, although with Apple's latest Yosemite OS/X, it is disabled for third party SSDs. Part of the kernel extension signing to prevent rogue changes to OS/X's most sensitive components.
I decided I don't care and won't use TRIM. There is anyway a small utility called TRIM enabler, which can get around the Yosemite restriction, and I do have a copy which I could use for a short time if TRIM recovery was ever needed. Pragmatically, I don't think use of TRIM is really an issue though. I've so much more space than I'm likely to need on this machine that running with/without TRIM is rather academic. Purist tekkies may disagree, but I'll take a slow 2-3 per cent degradation over a few years in preference to twiddling around with the inner protection layers of OS/X.
So all in all, a good and simple upgrade for the MacBook Air.
No comments:
Post a Comment